Craig Safety - Compliance Safety Manager™ – Employment Applications Program
Automating the Driver Qualification application is the fundamental way of easily managing all incoming applications as required by the Department of Transportation. If your company must abide by regulatory requirements under the Department of Transportation (DOT), you will benefit greatly from our systems application process. You will notice not only the efficiency of the application program and the significant cost savings, but also the consistently in complying with the rules and regulations.
By automating the Driver Qualification application process, organizations can direct applicants to apply online.
Employment Applications Program – Locations
To activate the Employment Applications, refer to the following instructions.
Navigate to the Settings icon located in the top right-hand corner of your screen.

From the Settings drop-down list, click the Locations module.
This will direct you to the Administration: Location homepage.
From the Active locations drop-down list, select the Location you want to run the Employment Applications program for and the click the Edit icon.
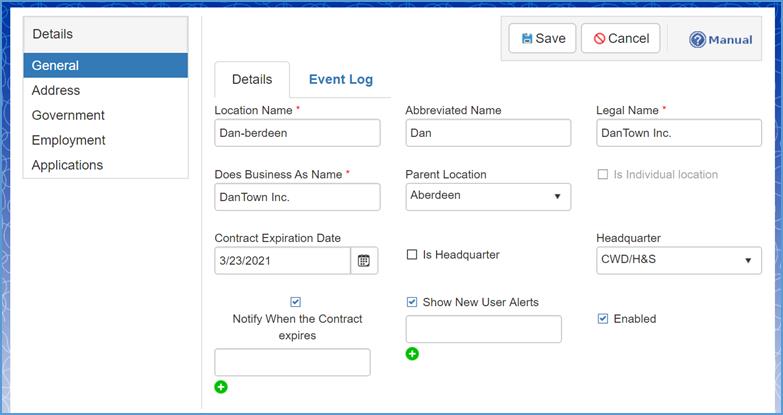
Once you have navigated to the specified company locations home screen, click on the Address module located in the Details menu (on the left-hand side of your screen).
Once you have navigated to the Address module, fill out all the required fields which are marked by a red asterisk (*). These fields include:
Address 1; City; State; Zip Code; and Phone.
Note: In order to activate the Employment Applications feature, the Physical Address section (shown above) must be completed for the specified location.
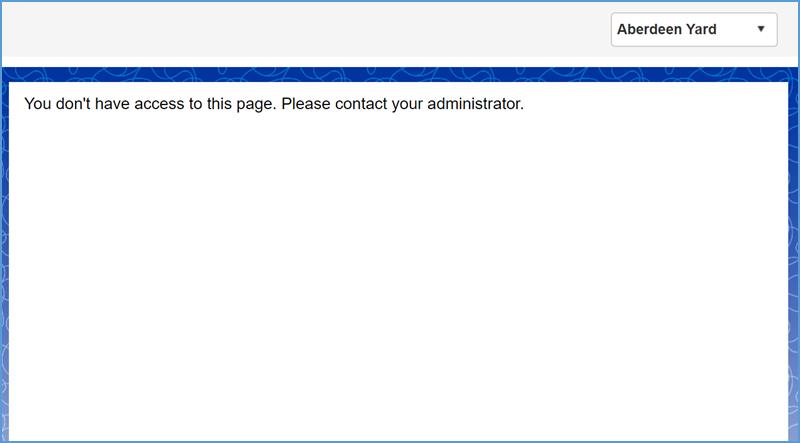
Note: Only Administrators can activate the Employment Applications feature.
The following screenshot will appear if you don’t have access to the Locations module.
Employment Applications
Once you’ve completed the Physical Address module, click on the Employment Applications module located on the left-hand side of the screen.
Refer to the following screenshot.

To begin with, Click the Enable Employment Applications checkbox located directly underneath the Employment Applications Setup section.

Next, navigate to the Location Logo field located on the right-hand side of the Enable Employment Applications field.

Click the Select button and choose your specific company’s logo. By doing so, your company logo will appear on each page of the Employment Application along the location name, address and telephone number.
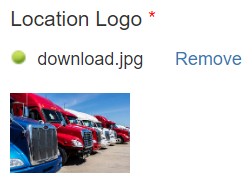
Pro Tip: You may need to adjust your logo to appear correctly in the application.
Below the Employment Application Setup section, you will see a the following sections: Alerts; User; and, Email.
Alerts
The Alerts section determines who will receive email alerts when Employment Applications are being processed. The different alert categories include Applications Received, Background Check Requests, Hired, and Not Hired.

Applications Received
After a candidate saves and submits his or her Employment Application, the application file will be directed to the designated customer location in Craig Safety - Compliance Safety Manager™.
An email alert will be emailed to the designated alert recipient. Multiple users may receive the alert if they have been properly set up in the Personnel Management program.
Navigate to the User field located on the right-hand side of the Applications Received alert, and type the name of the user(s) who will receive emails pertaining to all new applications.

After entering the first few letters of the specified name, an automated drop-down list will appear. Click on the select employee’s name from the drop-down list.
Too add additional recipients for the Applications Received alert, click the Add icon (the green plus sign) and repeat the process if applicable.
Pro Tip: The Email field is utilized for sending alert notifications to non-users outside of the system.
Background Check Requests
After reviewing the submission, the user needs to forward the given application to the person within your organization who performs all Background Checks.
Too add additional recipients for the Background Check Requests alert, click the Add icon (the green plus sign) and repeat the process if applicable.
Pro Tip: The Email field is utilized for sending alert notifications to non-users outside of the system.
Hired
After reviewing the Background reports, the specified location will be responsible for determining if the given applicant should be Hired or not.
Enter the name of the employee who you want to be notified of all new hires.
Pro Tip: The Email field is utilized for sending alert notifications to non-users outside of the system.
Not Hired
Enter the name of the person within your organization who you want to be notified off all applicants who are Not Hired.
Pro Tip: The Email field is utilized for sending alert notifications to non-users outside of the system.
Emails
Located on the far right-hand side of the fields shown above is the Email section. This is where you can enter specific email addresses which will be able to receive alerts for the Employment Applications being processed.

Note: If you want to add multiple email addresses to receive a specified alert, you must Enter a Comma (,) to separate each email address.

Refer to the following example.

Criteria
Located at the bottom of the Employment Applications homepage is the Criteria section. In this section, you can document any company-specific Driver selection criteria if applicable. The information you enter into the Criteria section will appear upon completing the Employment Application.
Note: Through this feature, you have the ability to insert text and images as well as numerous other options.

When you have completed entering all information that pertains to the Employment Applications section, click the Save button located in the top right-hand corner of the home screen.
Link of Employment Applications
After completing the Criteria section and click the Save button, the system will automatically generate a link that is displayed at the top of the page under the Employment Applications Setup section.

Note: The generated link can be posted to your organizations website so potential applicants can complete their application online. The link can also be sent directly to a specified applicant who calls your company, inquiring a position within your organization.
To access this link, click here This will direct you to the Employment Applications Program – Locations section in this user manual.
Employment Applications Program – Employment Application
Once the link to your Employment Application has been generated for your organization, it can be accessed by anyone from any device. The applicant will simply click on the specified link and be directed to the online Employment Application.
See the following screenshot.
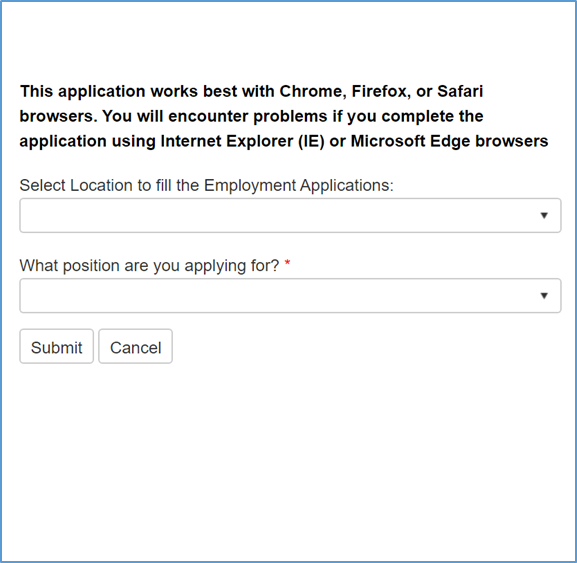
Note: The employment application works best with Chrome, Firefox, or Safari browsers. You will encounter system issues when using Internet Explorer or Microsoft Edge browsers.
To begin with, select the specific location you want to fill out the Employment Application for from the drop-down list provided. Next, select the position you are applying for. Specifically, choose from the following positions: e-DOT Driver Application – CDL; e-DOT Driver Application – Non-CDL; or, Regular Employee. When complete, click the Submit button and the application specific to the location and position you’re applying for will be displayed.
Applications for Employment Screens
Landing Screen
The Landing Screen provides information on Clearinghouse Registration, things you’ll need to know in order to fill out the application form, and Helpful Hints.
After registering for the Clearinghouse and reading all other pertinent information provided on the Landing Screen, click the Next button located in the bottom right-hand corner of the page.
Criteria Screen
After click the Next button, the Criteria Screen will appear. See the following screenshot.

Note: Each location may have a different criteria for hiring, therefore this page is customized during the Employment Application setup.
Once the Criteria page has been reviewed, click the Next button.

Personal Information Screen
For the Personal Information screen, you must fill in all required fields which are marked by a red asterisk (*).
See the following screenshot.
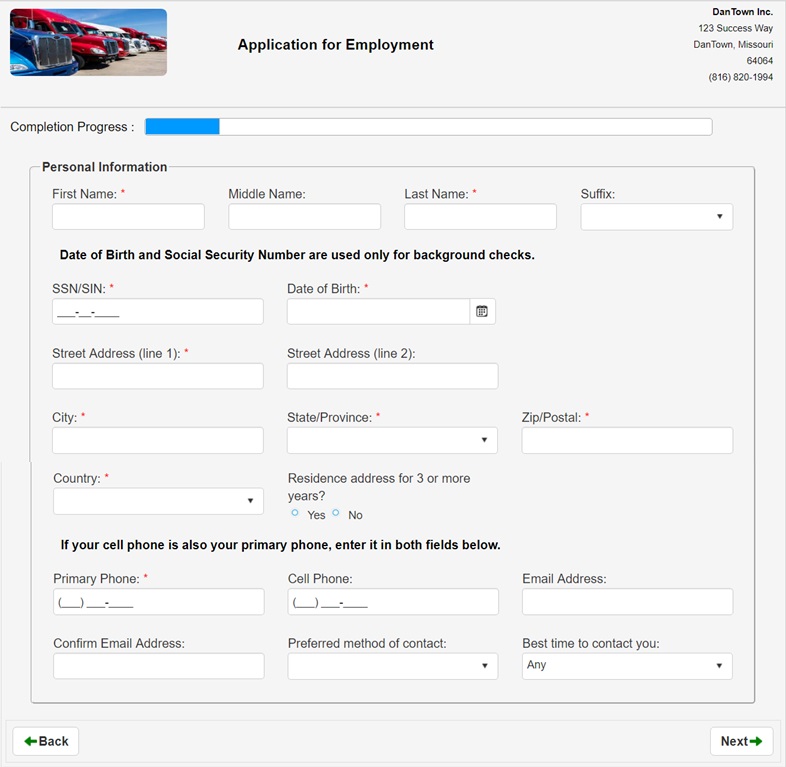
Note: If the applicant has already applied for another location using the online Employment Application program, then he/she can enter their First Name, Last Name, SSN and Date of Birth, and the system will retrieve the information from a prior application and auto-populate the required fields.
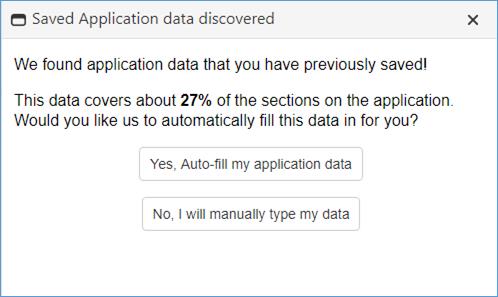
If you want to use the existing information, click the Yes, Auto-fill my application data button. This will auto-populate all fields required.
Note: You need to verify the auto-populated information before submitting the application.
If you do not want to use the existing information on file, click the No, I will manually type my data in button.
Residence Address
When you get to the Residence address for 3 or more years? field, you must select Yes or No.
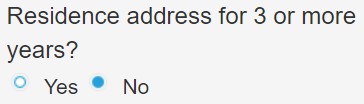
If you select No, the following screen will appear.

In order to continue with the application, you will need to document the previous 3 year(s) of residence history. To do so, state the: Address; City; State/Province; Zip; Move In; and, Move Out.
When complete, click the Update Residence History button.
General Information
The General Information is where the applicant will enter all applicable information, including: Driving Experience; Equipment (Owner/Operator Only); Education; and, Personal References.
Note: Under the Driving Experience section – For each class of equipment, enter type of equipment (van, reefer, tank, etc.) start and end dates, and approximate number of total miles. If no experience in a class, enter “NONE”.
Note: Under Personal References – List name, address, city, state, phone number, and relationship.
License Information
The License Information screen is where applicants will enter valid license information. You must enter at least one valid driver’s license.
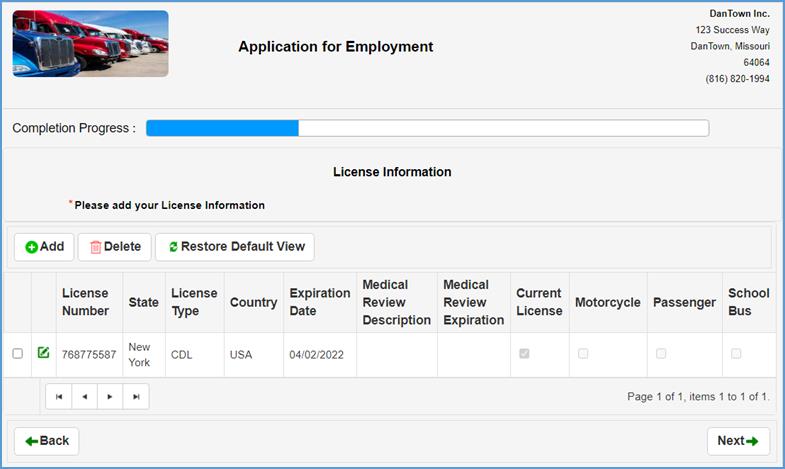
Note: The format of the license number will be verified against the standard format for the state that issued the license.
To add a new license to the Employment Application, click the Add button.

Enter all required information marked by a red asterisk (*), which includes the: License Number; License State/Province; License Type; County; and, License Expiration. Also, you must state if you have a Medical Card and clarify if this is your current driver license.

When complete, click the Save button. All changes will be reflected on the License Information screen.
Note: The applicant can add multiple license records in the Employment Application.
Employment History
All commercial motor vehicle applicants (CDL and/or Non-CDL) are required under DOT regulations to obtain the names and addresses of all employers/contractors for the past 3 years.
Drivers applying to operate with a Commercial Driver License (CDL) are required under DOT regulations to also obtain a list of the names and addresses of all employers/contractors (where they operated a commercial motor vehicle, including employers/contractors where the applicant only attended orientation), dates of employment, and the reasons for leaving such employment, during the 7-year period preceding the 3 years mentioned above.
See the following screenshot.
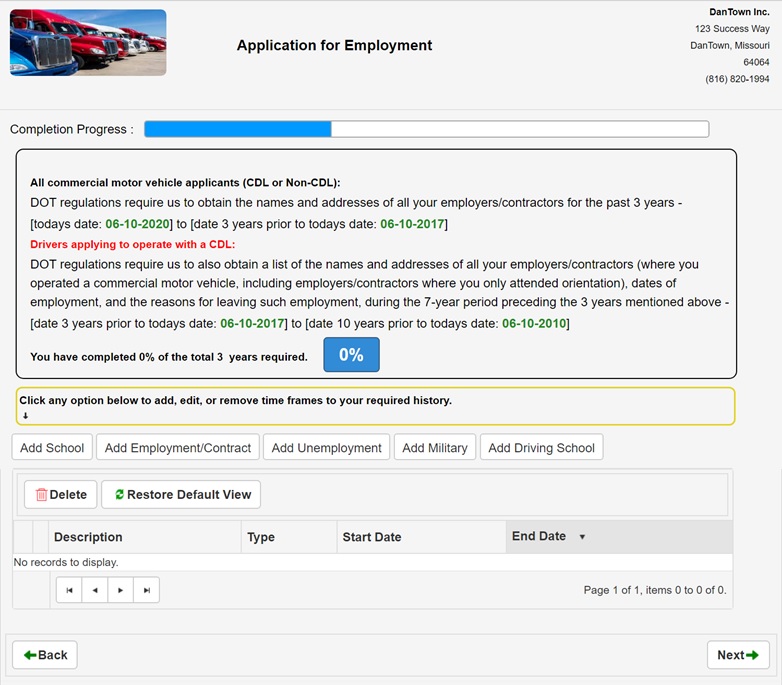
In order to comply with the required time frame of employment history, you have the following options provided by the software, which includes: Add School; Add Employment/Contract; Add Unemployment; Add Military; and, Add Driving School.

Add School
To add schooling to your required history request, click the Add School button.
This will navigate you to the Education Record section. See the screenshot below.
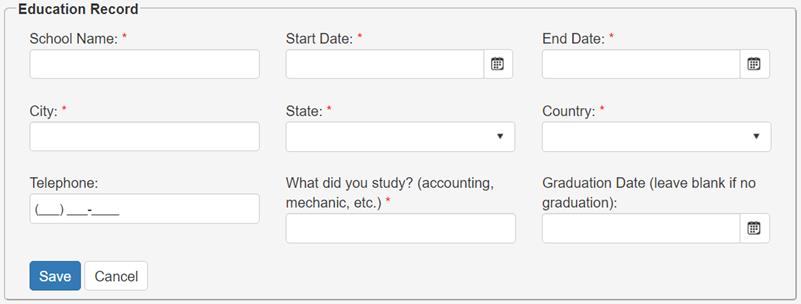
Enter the School Name, Start Date, End Date, City, State, Country, and your Field of Study.
When complete, click the Save button. All changes will be reflected in the required history grid.
Add Employment/Contract
When clicking the Add Employment/Contract button, you will be directed to the Work History Section.
Enter all required information, which includes the: Company Name; Start Date; End Date; Street Address; City; State/Province; Zip/Postal; Country; Telephone; Position Held; Reason for leaving; Most common truck driven; Most common trailer; Trailer length; and, all Yes or No questions.
When complete, click the Save button. All changes made will be reflected in the required history grid.
Add Unemployment
If you had any periods of unemployment during the past three years, click the Add Unemployment button.

Enter the Start Date and End Date and any other applicable information in the Comments field.
Click the Save button when complete.
Add Military
If you served in the military over the period of the past three years, click the Add Military button.
This will direct you to the Military Record section.

Enter all required information which includes the Branch of Service, Branch of Service Name, Start Date, End Date, Rank at discharge, and if you received an honorable discharge.
When complete, click the Save button.
Add Driving School
If you attended driving school over the period of the past three years, click the Add Driving School button.
Enter the following required information: Start Date; End Date; State (where school is located); School Name; City; Country; All Yes or No questions; and, any specific Programs that apply.
When complete, click the Save button. All changes will be reflected in the required history grid.
When the applicant has completed 100% of the total 3 years required of employment history, you will then be able to move on to the next section of the Employment Application.

Note: Before you can move to the next section, you must verify that you have completed all previous employment history required for the specified position you are applying for.

Motor Vehicle Record
After completing the required history part of the Employment Application, you will be directed to the Motor Vehicle Record section. This is where the applicant(s) will enter all motor vehicle record information.
There are a total of six questions under the Motor Vehicle Record section that must be answered by selecting Yes or No.
On the right-hand side of each question, you must enter todays date, confirming your acknowledgment.

Note: If you select Yes for any of the six questions, an additional field will auto-populate where you will Please Explain why. This is a requirement for all questions answered with a Yes.

Once you have entirely answered each required question under the Motor Vehicle Record section, you can click the Next button and navigate to the following section.
Traffic Conviction/Violation History
In this section, the applicant will enter any Traffic Conviction/Violation History they’ve encountered.
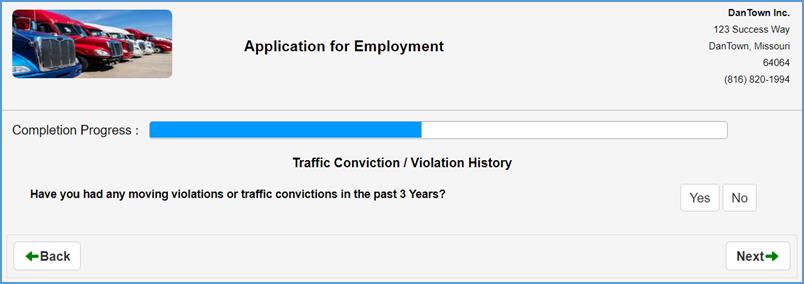
If you select No, you will be directed to the next question.
If, however, you select Yes, the following section will display.

To add a traffic conviction and/or violation that occurred in the previous three years, click the Add button.

Enter all required information, which includes the: Violation Date; Charge/Description; State; If you were in a Commercial Vehicle; and, any Penalty/Fine associated with the traffic conviction/violation.
When complete, click the Save button.
Accident History
In this section, the applicant will document if they have been involved in any accidents and/or incidents with any vehicle in the last 5 years (even if they were not at fault).
If you select No, the system will navigate you to the next Employment Application section.
If you select Yes, the following section will auto-populate on the Accident History screen.
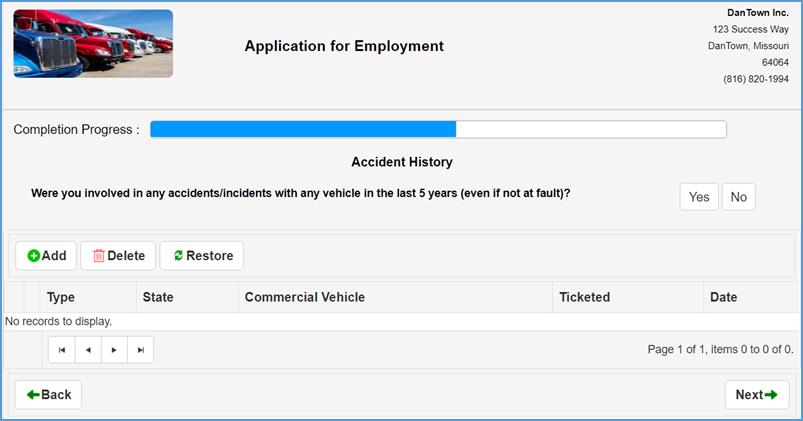
To add a new accident specific traffic conviction/violation, click the Add button.
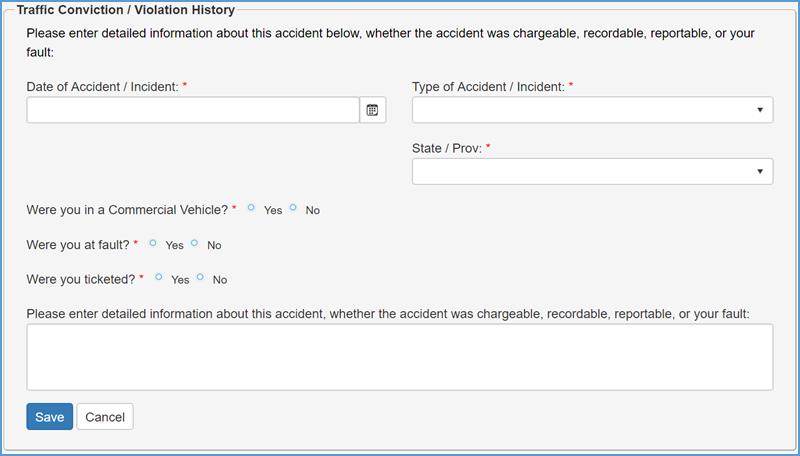
Fill in the required information which is marked by a red asterisk (*). This includes the: Date of Accident/Incident; Type of Accident/Incident; State/Province; and, all Yes or No questions.
When complete, click the Save button.
Confirm History Details
The Confirmation screen displays a summary of all application entries that have been made. When you reach this page, you should verify that all information entered is correct.
Note: If you want to change any of the details, click the Back button located at the very bottom of the Confirmation page. Navigate to the page you wish to make changes to and save information when done.
At the bottom of the Confirmation screen, the applicant will use his/her mouse to sign their name in the provided field.
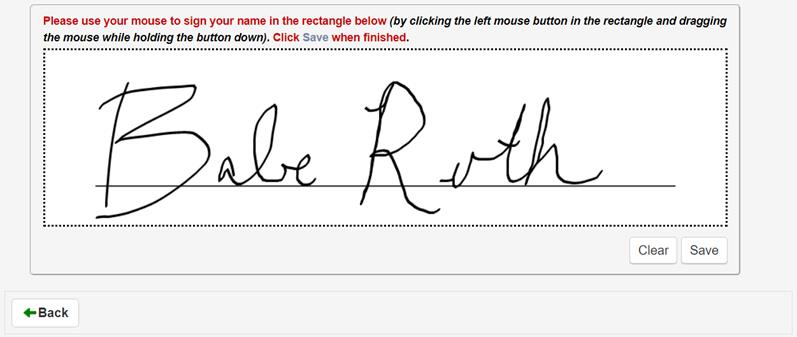
Note: This is done by clicking the left mouse button in the rectangle and dragging the mouse while holding the button down.
To clear the existing signature, click the Clear button. When you have successfully provided your electronic signature in the required field, click the Save button.
IMPORTANT DISCLOSURE REGARDING BACKGROUND REPORTS FROM THE PSP Online Service
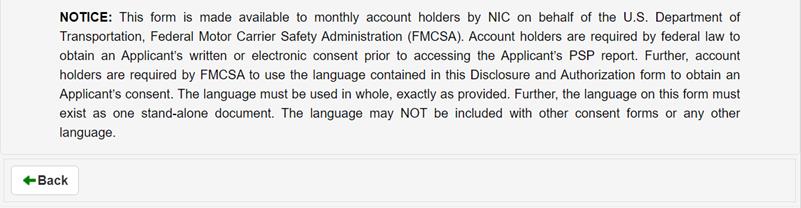
After reviewing the Disclosure Regarding Background Reports, you are required to Print Name (First, Middle, Last) and todays Date.

After doing this, use your mouse to your name in the rectangle provided.
When complete, click the Save button.
Note: If you want to print the disclosure regarding background reports, click the Print Release Information button located in the top right-hand corner of the document.
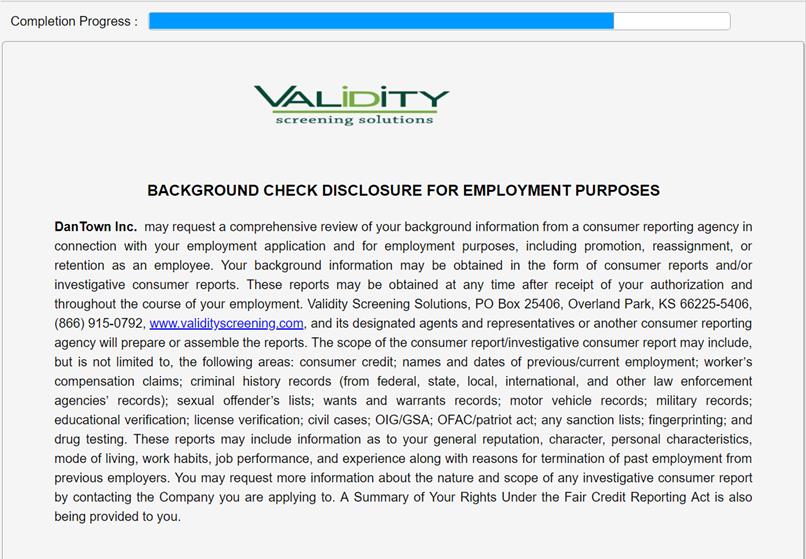
BACKGROUND CHECK DISCLOSURE FOR EMPLOYMENT PURPOSES
After reviewing the Background Check Disclosure for Employment Purposes, you must acknowledge and authorize the background check.
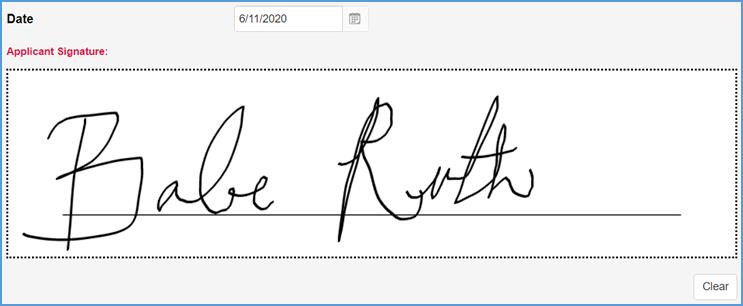
After reviewing the document, fill in all required information under the ACKNOWLEDGEMENT AND AUTHORIZATION FOR BACKGROUND CHECK section.
You must enter todays Date and provide your Applicant Signature.
At the bottom of the page, you must fill out the following required information.
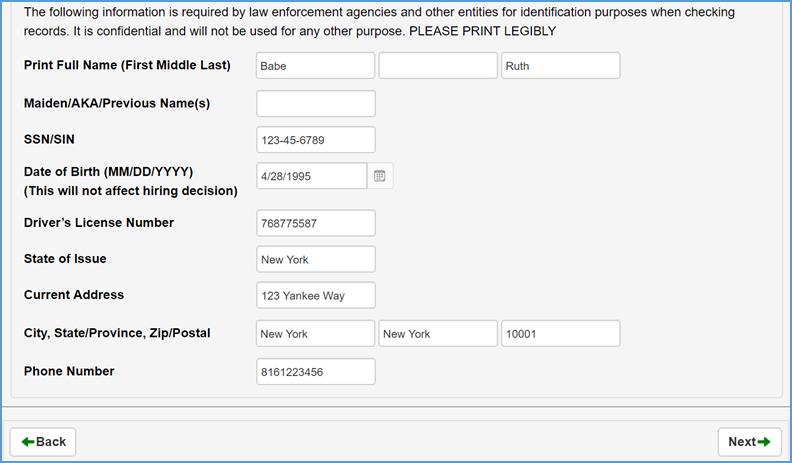
Note: The following information is required by law enforcement agencies and other entities for identification purposes when checking records. It is confidential and will not be used for any other purpose. PLEASE PRINT LEGIBLY.
After reviewing the Background Check Disclosure form and providing all required information, click the Next button.
General Consent Form
The General Consent Form pertains to the General Consent for Limited Queries of the Federal Motor Carrier Safety Administration (FMCSA) Drug and Alcohol Clearinghouse (§ 382.703).
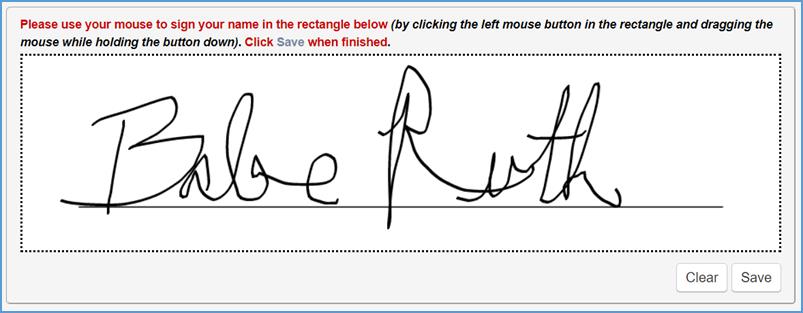
After reviewing the document, enter todays Date and use the mouse to sign your name in the rectangle field provided.
When complete, click the Save button.
A Summary of Your Rights Under the Fair Credit Reporting Act
After you have reviewed and acknowledged the Fair Credit Reporting Act summary, click the Next button.
Verification of Employment Request
To verify your Employment Request, enter the following information: Print Name (First, Middle, Last); SSN/SIN; Date of Birth; and your Signature to authorize verification of employment history.
Refer to the following screenshot.

After entering the required information, click the Next button.
Final Page
On the final page of the application for employment, re-enter your SSN and Date of Birth to certify that this application was completed by you and that all entries on it and information in it are true and complete to the best of your knowledge.
To begin with, fill in the required fields, which include: Applicant’s Full Printed Name; SSN/SIN; Date of Birth; and, Upload Resume (if applicable).
Next, check the box if you would like to save this form data.

Note: If you save, the next time you apply the data will pre-fill for you. Saving also enables you to edit your data in the future.
You also have to option to get a copy of the Employment Application sent to you directly. This is optional, but if you want a copy, provide your personal Email Address is the field provided.

The last thing that is required before submitting your Employment Application is to electronically sign your name in the provided field.

When complete, click the Submit Application button located in the bottom left hand corner of the final page.

Confirmation Page
The confirmation page will provide your Confirmation Number and a phone number to contact in case you have any additional questions.
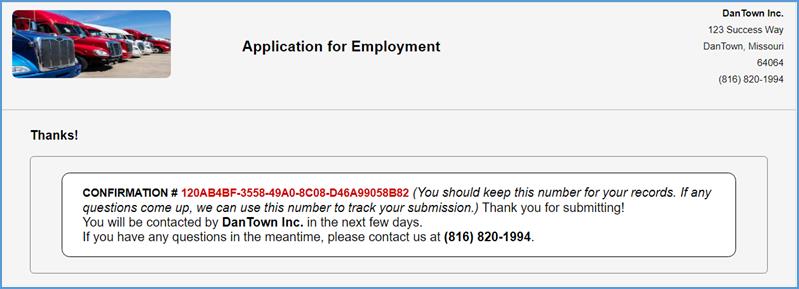
The following screenshot is an example of what the submitted application will look like to the employer.

Employment Applications Integration with Personnel Management
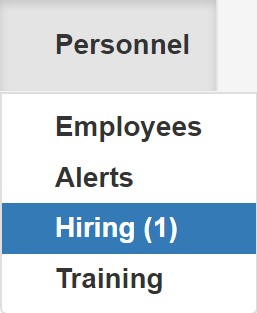
Once an Employment Application is submitted through the Craig Safety - Compliance Safety Manager™ system, the specified application is sent the location they applied under. After submission, applications are sent to the Hiring module located in Personnel Management
Note: Go to the Hiring module to view all applications that were received, but have not yet been processed by HR.
After clicking on the Hiring module, you will be directed to the Personnel Management: Employment Applications homepage.
See the following screenshot.
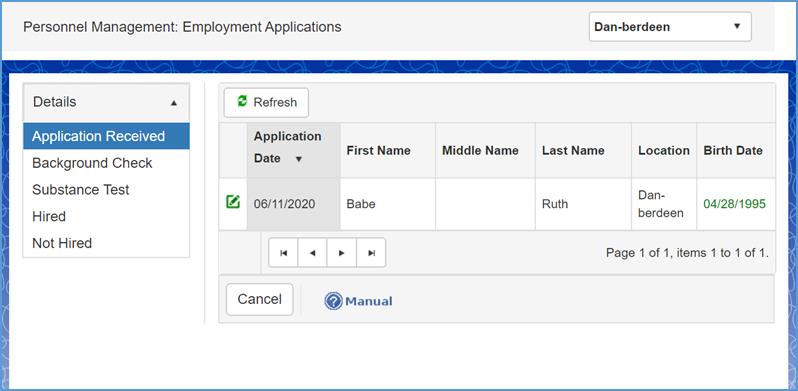
When a new Employment Application is submitted, there are five modules auto-generated under the Hiring section which include: Applications Received; Background Check; Substance Test; Hired; and, Not Hired.
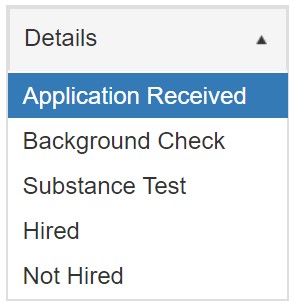
Personnel Management: Hiring – Applications Received
Begin by selecting the Applications Received module which is located on the far left-hand side of the home screen.

On the Applications Received home page, you will see all application details, including the: Application Date; First Name; Middle Name; Last Name; Location; and, Birth Date.
To view and/or make changes to the application, click the Edit icon.
Under the specified application details, Craig Safety - Compliance Safety Manager™ offers a variety of features.
Action buttons are displayed at the top and bottom of the application under this module. Process Background Check, Print Release Information, Print Background Disclosure, mark the applicant as Not Hire, or Cancel.
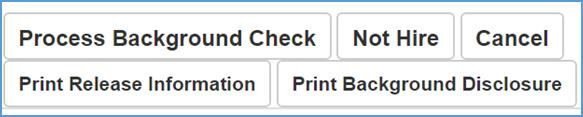
If you want to move to the next module, click the Process Background Check button. This will escalate the Employment Application to the next stage. The same transfer applies to the Not Hire and Cancel buttons.
Note: An alert will be sent to the designated person for that alert.
If you want to print the Release Information or Background Disclosure, click the corresponding button(s) as needed.
Personnel Management: Hiring – Background Check
Click on the Process Background Check module located on the left-hand side of the screen.
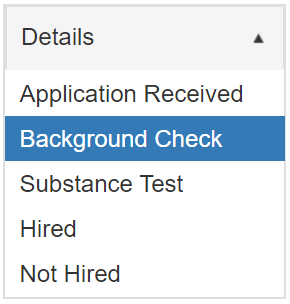
When you click on the Background Check module, the following actions buttons will display at the top and bottom of your screen.

To escalate the Employment Application to the next stage, click the Substance Test button. In doing so, the application will be moved to the Substance Test module.
You also have the ability to Hire or Not Hire the applicant by pressing the corresponding action buttons.
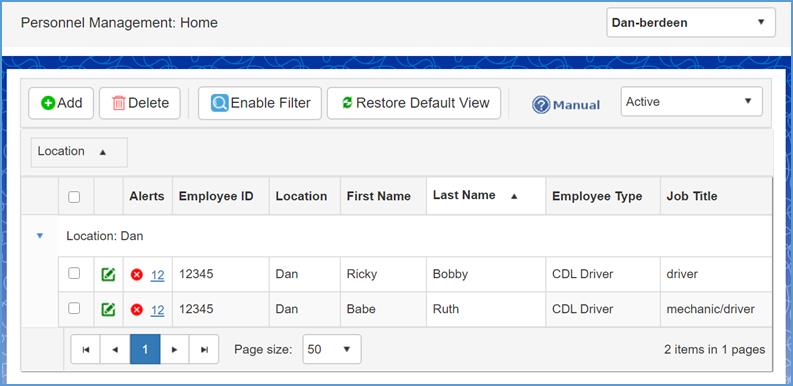
Note: By clicking the Hired button, this will automatically setup the driver in your locations Personnel Management program.
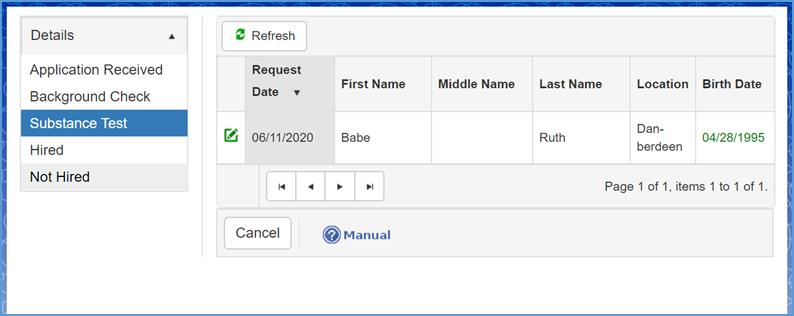
Personnel Management: Hiring – Substance Test
This is the final module of the Hiring escalation process. Click the Substance Test module located on the left-hand side of your screen.
Refer to the following screenshot.

To edit the Employment Application, click the Edit icon.
At the top, you will see four tabs, which include: Details; Schedule Test; Test Result; and, Documents.
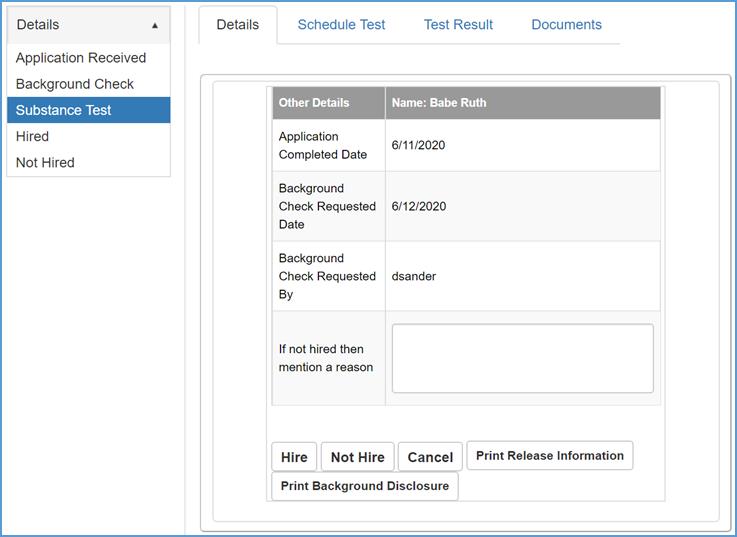
To schedule a substance test, click on the Schedule Test tab.

After the test results have come back from the lab, the confirmation document will display in the Test Result tab.
Any substance testing documentation you’d like to store for the specific applicant, can be under the Documents tab.
From the action buttons found at the top and bottom of the Substance Test screen, you can decide whether or not to Hire or Not Hire the applicant.

Note: If you decide to Hire the applicant after running a background report and substance test, click the Hire action button. This will automatically populate their credentials in the Personnel Management program.
If you do not want to hire the specified applicant, click the Not Hire action button.
Note: An alert will be sent out to the person within your organization who is set up to receive an email with applicants who are not hired