Craig Safety - Compliance Safety Manager™ - General Functionality
This
section describes various functionality that exists through-out the
Craig Safety - Compliance Safety Manager.
General
Functionality: Introduction

After logging into the system, you will arrive at the ‘Home’ page. Across the
top of the web browser are the different programs at your disposal.
These include:
“Personnel“ Management – This program allows you to manage the employees in your organization.
Within Personnel Management you will find two additional programs:
“Hiring” Management – This program allows you to manage the hiring process of new employees.
“Training” Management – This program allows you to schedule and manage training classes for your employees.
“Assets” Management – This program is where you manage the assets in your organization.
“Incidents” Management – This program is where you manage accidents and claims under your organization.
“Reports” Management – This section is where you run reports for Employees, Assets and Incidents for your organization.
General
Functionality: General Navigation
Creating
Records
Depending on where you are in the system, there are two ways to add records.
The first is creating a new entity (for example a new employee or asset) in a program.
The second is creating a new record for an existing entity.
Entity Creation
When creating a new entity, navigate to the correct program and click the
Add button.
Fill
in the required data and press the “Save” button when
complete.
Note: The system will let you know if you are missing required data.
General Record Creation
To create a record for an existing entity, follow these steps:
Step 1: Navigate to the appropriate management program and select the entity you wish to create a new record for.
Step 2: Locate the module you wish to add a new record in.
Step 3: Click the Add button to open the form.
Step 4: Fill out the form and click the Upload button.
Updating/Editing Fields
When updating and/or editing data fields, refer to the following steps:
Step 1: Navigate to a specific Program’s module; some modules will present fields for editing immediately and some will present a grid listing of your current records.
Step 2: If a grid is listed, you can double click the grid row you want to edit, or you can click the Edit icon to access the editable fields.

Step 3: Update the necessary fields and click the Save button when done.

Deleting Records
In the system, you have the option of deleting an entity (e.g. employee or asset)
or a general record within an entity.
When deleting an entity or general record, refer to the following steps:
Step 1: Check the selection box for the entity or general record you wish to delete.
Step 2: Once you have selected the entity or general record, click the Delete button.
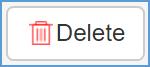
Step 3: A window will pop up asking for delete confirmation. Click 'OK' and the record(s) will be deleted. Click 'Cancel' and the delete will be canceled.
General Functionality: Documents
To add or upload a document into Craig Safety - Compliance Safety Manager™, refer to the following steps:
Step 1: Navigate to the desired Program on the menu bar and select an entity (e.g. employee or asset) that you’d like to upload a file for.
Step 2: After selecting the specific entity, navigate to the correct module where the document should be saved and click the Documents tab.

Step 3: Click the Add button.
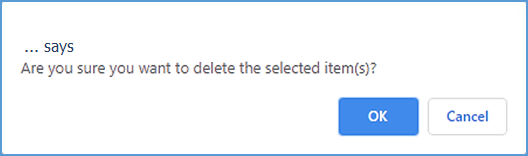
Step 4: Once this screen appears, there are two ways you can upload the document into the system. The first way is to click the Select button, which will navigate you to your file folder. The second way you can upload a document into the system is simply dropping your file in the specific field labeled Drop Files Here.
Step 5: Once selected, click the Upload button.
Note: The File Upload screen gives the User an option to classify the document category, expiration date (if any), and description. Setting an expiration date for your document will produce an alert which will notify the User 45 days in advance of the set expiration date.
Pro Tip: Document Expiration is used for Document Retention requirements.
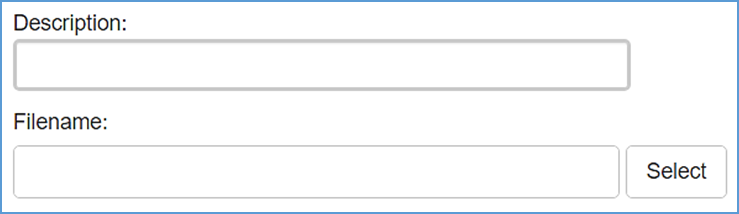
Step 6: To change the filename or description of the uploaded document, simply type the new naming convention in the Description and/or Filename box. When complete, click the “Upload” button.
Note: The user has the option of uploading a secondary document. When the second document has been added, click the Upload button.
General Functionality: Notes
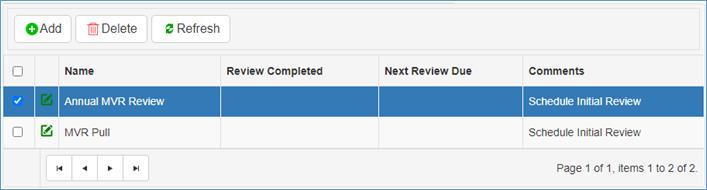
Under the correct Program module you wish to add a note, navigate to the Notes tab (next to the Documents tab).

In the Notes section, the User can enter specific information not already entered into the system that may need immediate or temporary attention.
Step 1: To add a note click the Add button.
Refer to the following screenshot.
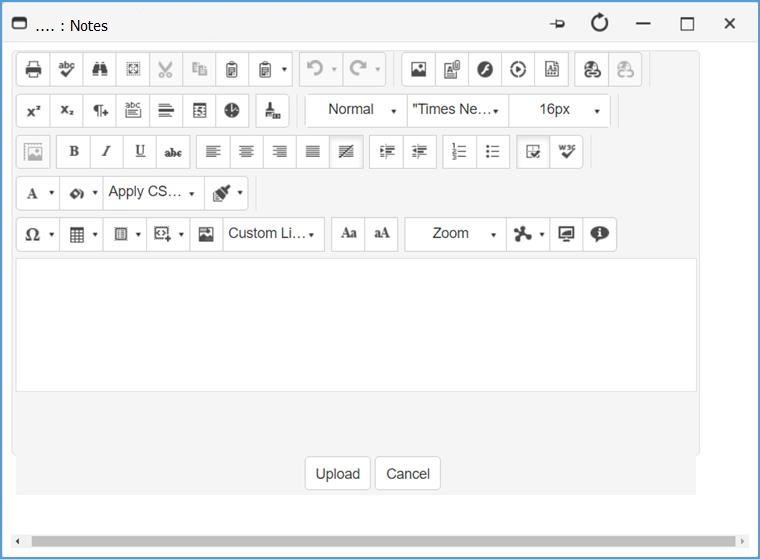
Step 2: Click the Upload button when complete.
General Functionality: Alerts
To access the alerts for an item, navigate to the correct Program where the alert(s) exist and select the record. An employee record will be used for this example:
The last tab across the top of the ‘Employee’ screen is Alerts. This enables the User to view the alerts associated with a specific employee. Under this tab, you will see the Alert, the Severity of the Alert, and the Expiration date.
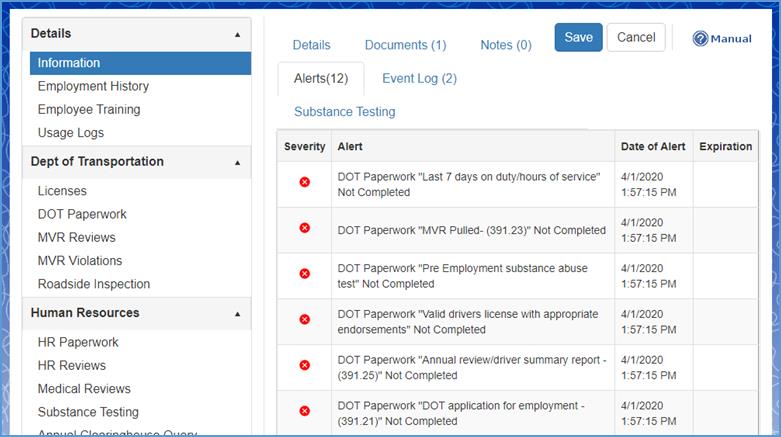
Alerts in the Craig Safety - Compliance Safety Manager web application are categorized by Severity levels:
- Level 1 – Informational

- Level 2 – Warning

- Level 3 – Critical

These alerts are displayed on the web application’s Home screen and under the Alerts tab in the following Programs:
Personnel Management;Asset Management; and Incidents Management.
When you first open a specific entity (driver, asset or incident), you will automatically be in that entities Information module where you will see all of the alerts for that specific entity under the alerts tab.
Specific alerts are also visible within each specific module where they originate from which can be viewed under the Alerts tab for that module. (e.g. An asset with a license which is about to expire will display the warning under the Alerts tab in the License module of said asset.)
Informational Alert
An ‘Informational’ alert is utilized to inform the user of an item that needs attention but is not required to take care of immediately.
Informational Alert Icon
Warning Alert
A ‘Warning’ alert is utilized for upcoming expirations.
Warning Alert Icon
Critical Alert
A ‘Critical’ alert is utilized for necessary data missing, expiration of an alert or critical status of an upcoming alert the user has determined to escalate.
Critical Alert Icon
Alerts can be configured under Settings → Setup → Configure → Alerts
General Functionality: Date Fields
When adding/editing an entity or record in the system, you will see a date field that is marked by a Calendar icon.

This is the field where you choose specific dates. When you click on the Calendar icon, a calendar will appear which allows the user to select a specific date. (Refer to picture below)

The system will also allow users to manually enter the date in ‘MM/DD/YYYY’ formatting. You can enter a slash (/), hyphen (-), or dot (.) to separate the months, days, and years. An addition option is using ‘MMDDYYYY’ formatting for the date. The system will automatically convert the date to ‘MM/DD/YYYY’ formatting.
Note: The maximum limit allowed is 20 characters. If an invalid input is entered, the system will display an error message below the calendar field.
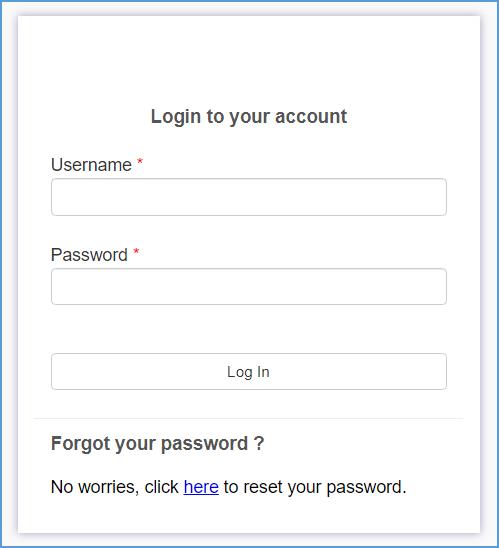
General Functionality: Login
To successfully login to the system, you must enter valid credentials in the Username and Password fields. If you forget your password, simply click the link labeled ‘here’ at the bottom of the login page.
Login screen:
General Functionality: Required Fields
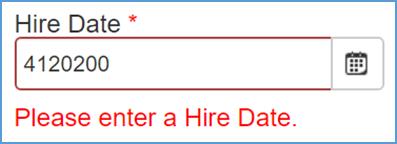
When editing/adding an entity or record in the system, required fields will be marked with a red asterisk (*).

If an input is not provided, the system will display an error message in red colored font below the field, informing you what action needs to be completed. (Refer to picture below)

General Functionality: General Reports
Training Expiration Report
The training expiration report can be accessed from the Home Page → Reports → Training → Training Expiration.
And
Personnel → Reports → Training → Training Expiration.
This report displays training records that will expire within filtered days for all employees within location(s) selected. Refer to the screenshot below.

By default, records are sorted alphabetically for the Employee Name column, but this can be adjusted under Sort Order.
Step 1: In the Days Before Expiration field, value(s) between 0 and 365 can be entered.

Step 2: To select a specific date range, navigate to the Selection Criteria field and click the Date Range value.

Step 2(a): Next, locate the From Date and To Date data fields and enter in the specific dates you wish to run for the training expiration report.


Step 3: If the user wants to run the report for a specific location, navigate to the Location dropdown and select the preferred location.
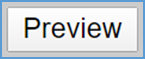
Step 4: Select the Preview button to run the report.

Employee Driver Report
The Employee Driver Report can be accessed from the Home Page → Reports → Employee → Driver → Drivers
And
Personnel Page → Reports → Driver → Drivers.
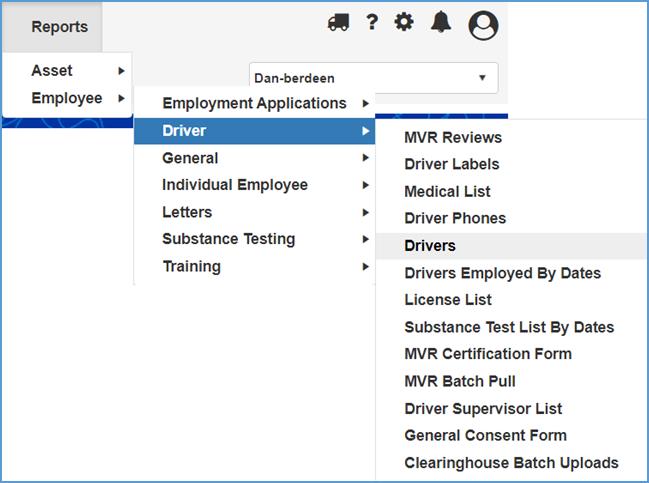
The Employee Driver Report allows the user to view all active employee records within the system. By default, records are sorted alphabetically for the Employee Name column.


To filter the records, the user must enter a specific string of text(s) in the filter box.

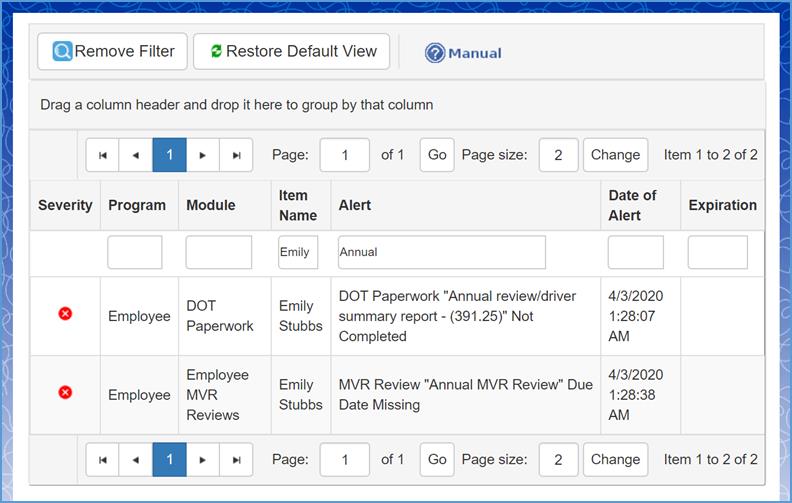
Home: System-Wide Alerts
After logging into your Craig Safety - Compliance Safety Manager™, account, you will be taken to the Home Screen which displays system-wide alerts for your company. Refer to the following screenshot.

System-wide alerts fall under two programs: Assets and Employee. Alerts are categorizes by specific column headers. Column headers include: Severity; Program; Module; Item Name; Alert; Date of Alert; and, Expiration.

The Craig Safety - Compliance Safety Manager™ Home page automatically sorts all groups alphabetically in a descending or ascending format. Therefore any columns with results will be in an alphabetical descending or ascending format.
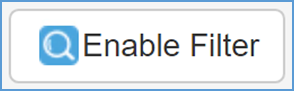
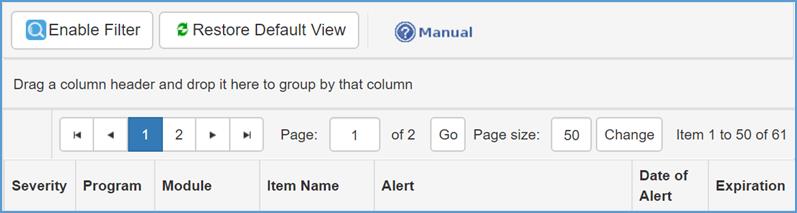
Enable Filter
The first feature available on the system-wide alerts home screen is the Enable Filter. The Enable Filter allows the user to search for a specific item. You can find the Enable Filter button in the top left hand corner of your screen.
Step 1: Click the Enable Filter button.
Step 2: Fill out the fields located under each column to search for a specific alert.

Note: When you fill out a field(s), our software will automatically search the specific alert you want to view.
Example: If you are searching for a specific alert for one of your employees and know which specific alert you want to view for that employee, you would type the information in the Alert column.
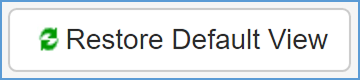
Remove Filter
If you want to remove the filter, navigate to and click the Remove Filter button in the top left-hand corner.

You can also restore the system-wide alerts screen by clicking the Restore Default View button located next to the Remove Filter button. This will reset all filters put in place by the user.
Another feature available in the System-wide Alerts program is Page Selection and Page Size. These fields are located in the top center of the system-wide alerts home page. You can also find these at the bottom of the grid.
Page Selection

Step 2: Click the Go button when complete.
Page Size
Step 1: To change the page size, navigate to the Page size field and enter the set number of system-wide alerts you’d like to view per page.

Step 2: Click the Change button when complete.
An alternative way the user can filter data on the system-wide alerts home page is grabbing and dropping the column headers into the field labeled Drag a column header and drop it here to group by that column.
Step 1: Grab the column header with your cursor and drop it in the field shown above. Refer to the screenshot below.

Note: You can select and drop as many column headers as you would like and have the option of organizing them in the order you choose.