Craig Safety - Compliance Safety Manager™ – Assets Management Program
The Assets Management Program captures detailed information on each asset within your company. This program also stores and archives all documentation.
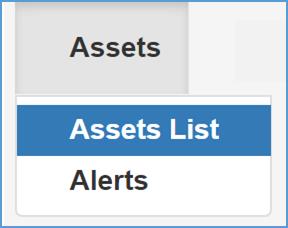
The Assets Program drop-down list has two tabs: The Assets List tab; and, the Alerts tab.
Assets Management Program: Assets List
This will navigate you to the Assets Management: Home Page. Refer to the following screenshot.
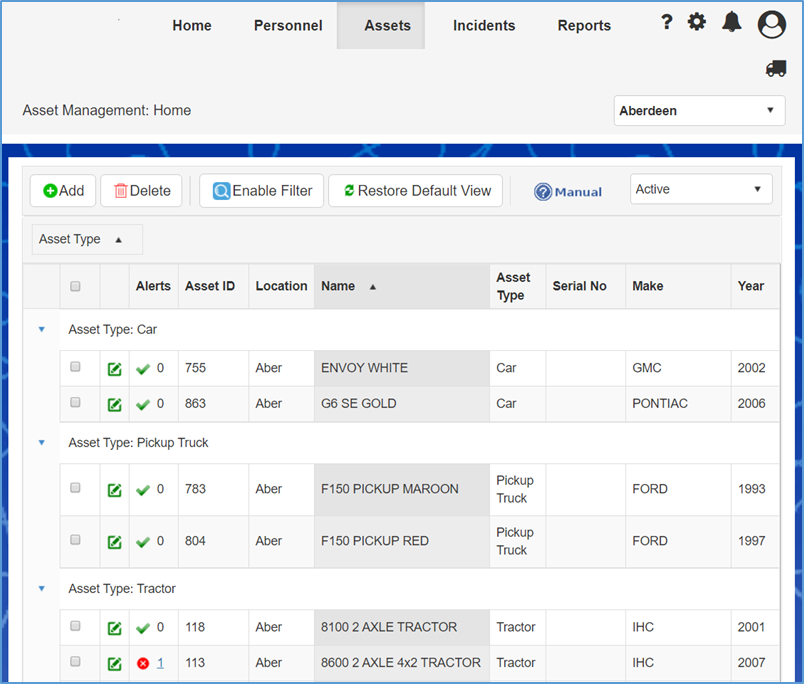
The Assets tab allows the user to view the assets associated with the current location and all the children locations (if applicable). You have the ability to sort, group and filter columns.
Click here to navigate to the Home Page: Enable Filter section to learn more about filter features.
There are two ways you can access a current asset record and see the detailed information associated with it. The first is by clicking the Edit icon. The second way is double clicking on the specific asset.
The Inactive tab allows you to view the asset(s) that are not currently being utilized within your organization. To access this feature, choose Inactive from the drop-down list in the top right-hand side of your screen.

New Asset
Step 1: To add a new Asset, click the Add button. The following screenshot shows the screen that will display after.
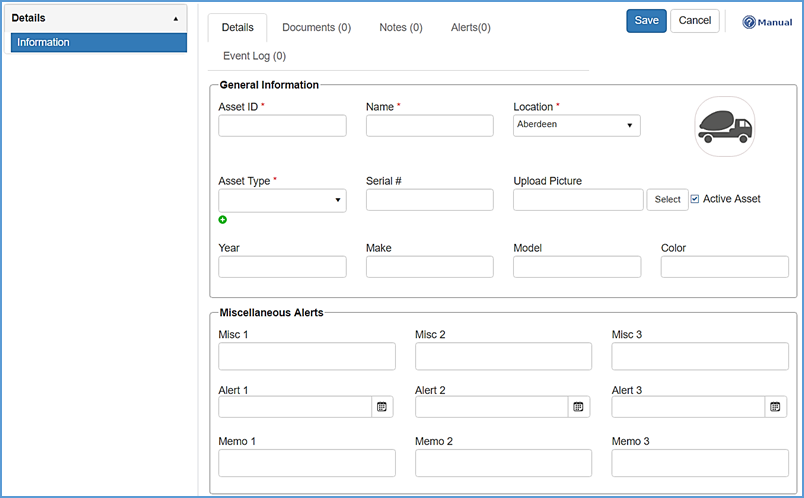
Step 2: Enter all the information for the specified asset and click the Save button when complete.
Pro Tip: Use proper naming conventions to easily recognize your assets when in reporting and other areas of the system (think Asset ID and Name). You don’t want 30 trucks all with the name “Ford”, it will be difficult to distinguish between them.
The Miscellaneous Alerts section allows the user to set and name user defined alerts that fall under the specified asset. By doing this, the system will prompt alerts to notify you when the alert date is approaching.
Pro Tip: You will find many fields to set alerts, use the miscellaneous alerts for anything additional not covered by the system.
Documents
Click on the Documents tab located on the right-hand side of the details tab to edit, view or add archived documents in the system which pertain to the specified asset.
The documents page includes a brief Description, File Name and File Size, the Created By (creator) and Created Date, and the Expiration Date.
Click here to access the General Functionality: Documents section for more information on how to upload new documents.
Notes
Click here to navigate to the General Functionality: Notes section to learn how to add notes for the selected asset.
Assets Management Program: Details – Purchase
The Purchase module covers general information that pertains to the selected asset (e.g. Purchase Price, Date Purchased, Disposal Date, etc.). When clicking on the Purchase module, the following screen will appear.
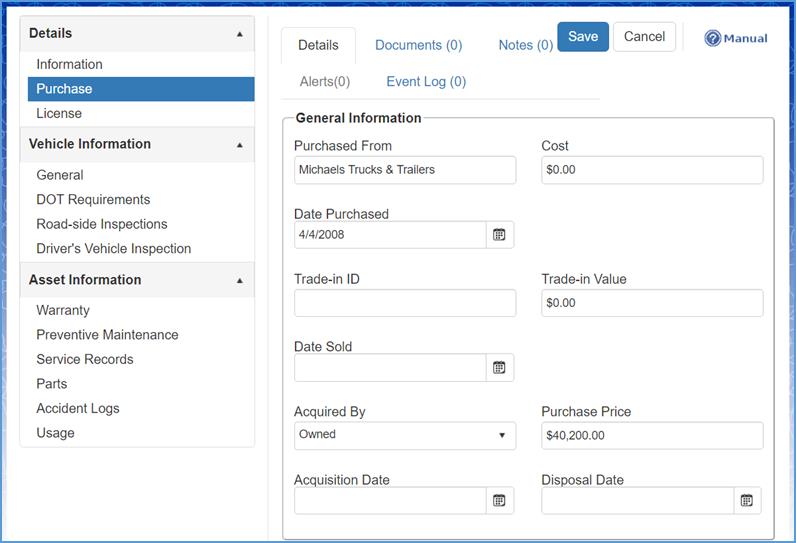
Once the information has been added, click the Save button.
Assets Management Program: Details – License
Under a specific asset, the License module can be found on the left hand side of your screen under the Purchase module. The following screen will appear after clicking on the License module.
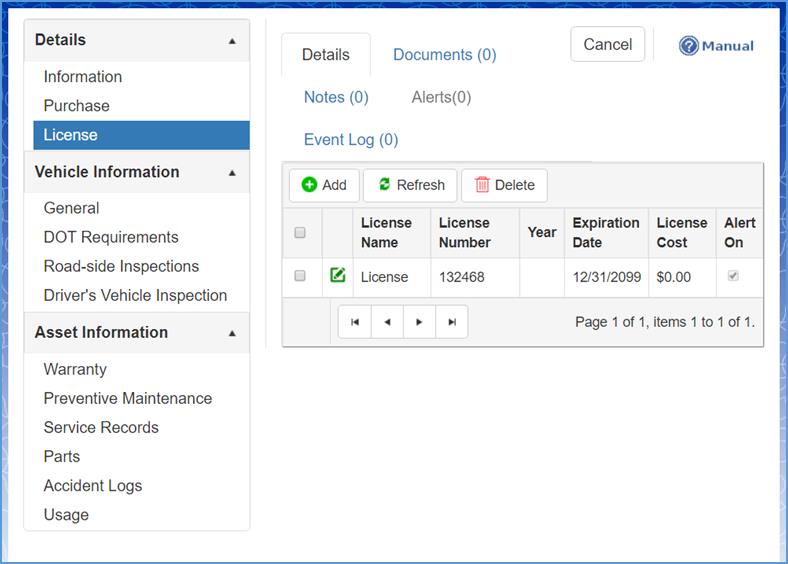
The License module is where the user can enter relevant information for a specific asset. This includes: The License Name; License Number; License Year; The Expiration Date; The License Cost; and, whether or not they’d like an Alert On.
To add a new License, click the Add button. Refer to the following screenshot.
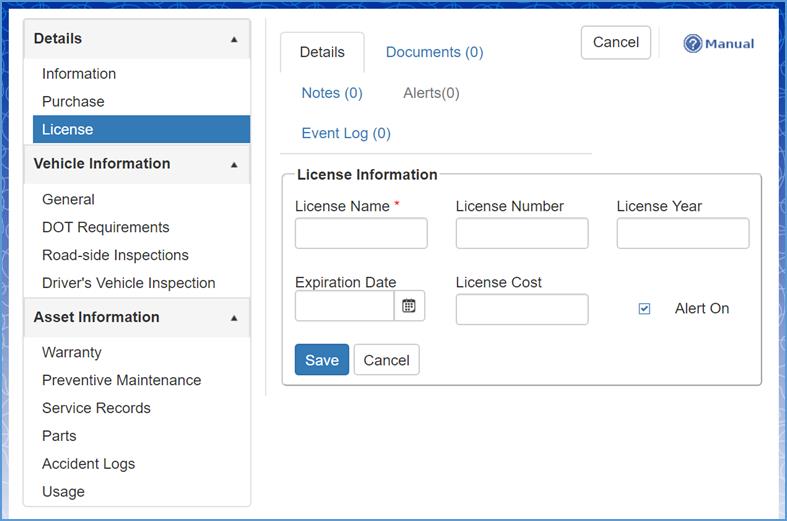
Note: By entering the expiration date of the license and selecting the Alert On checkbox, the system will prompt alerts for you when the expiration date is approaching
Once all information has been filled in, click the Save button.
Assets Management Program: Vehicle Information – General
In the General module, you can record Vehicle Information, Inspections and Expirations and Tire Information for a specific asset.
By clicking on the General module, located on the left-hand side of the user’s screen, the following page will display.
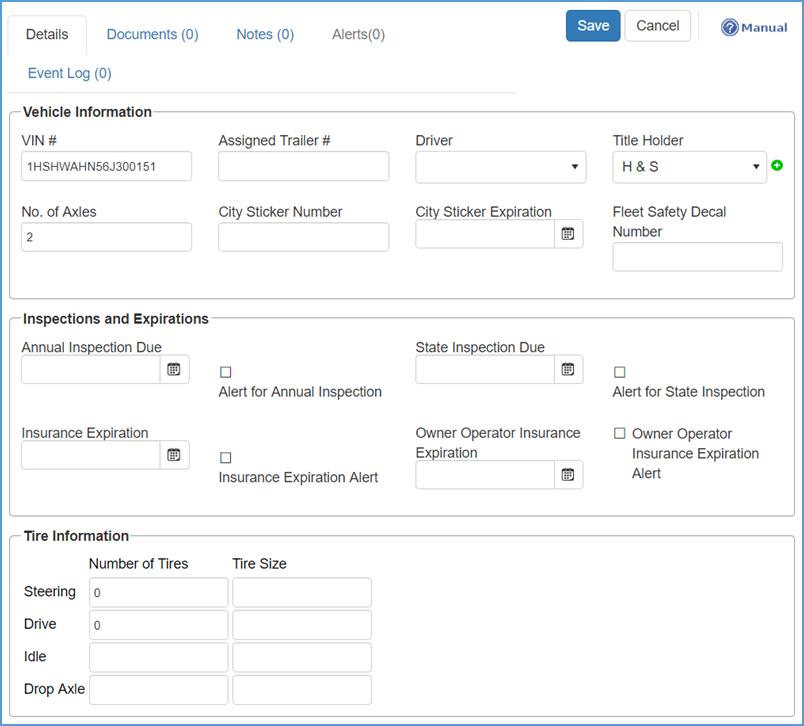
Make any changes you wish and when complete, click the Save Button.
Note: By checking the Alert for State Inspection and/or the Owner Operator Insurance Expiration Alert fields, the system will prompt alerts for the specified asset. By unchecking them, the alerts will be suppressed.
Assets Management Program: Vehicle Information – DOT Requirements
Under the DOT Requirements module, the user can track and document DOT Inspections and Expirations, Heavy Highway information (if applicable), and Vehicle Weight
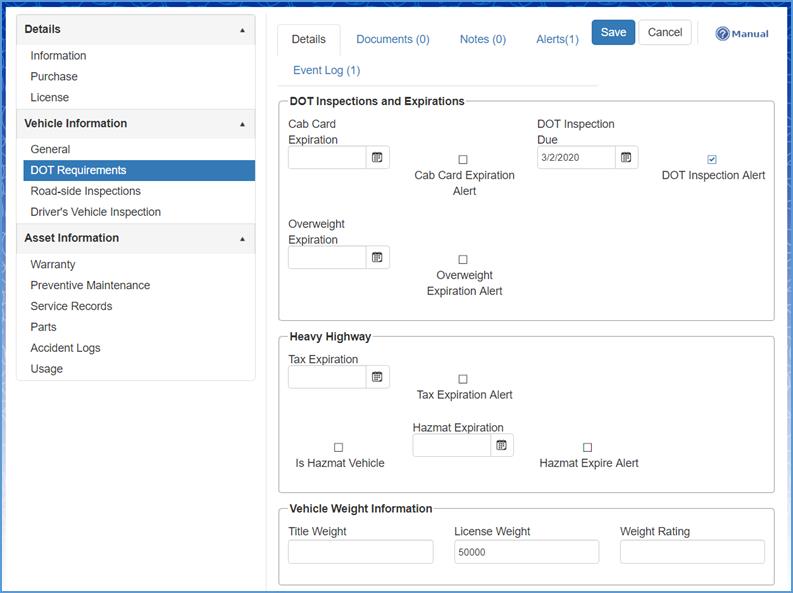
Enter the information that applies to the specified asset and click the Save Button when complete.
Assets Management Program: Vehicle Information – Roadside Inspections
In the Vehicle Information module, the user can document all Inspection Details for a specific asset.
After clicking on the Roadside Inspections module, the following page will display. Under the Details tab, you will see the Inspection Date, Inspection State and the Officer Name.
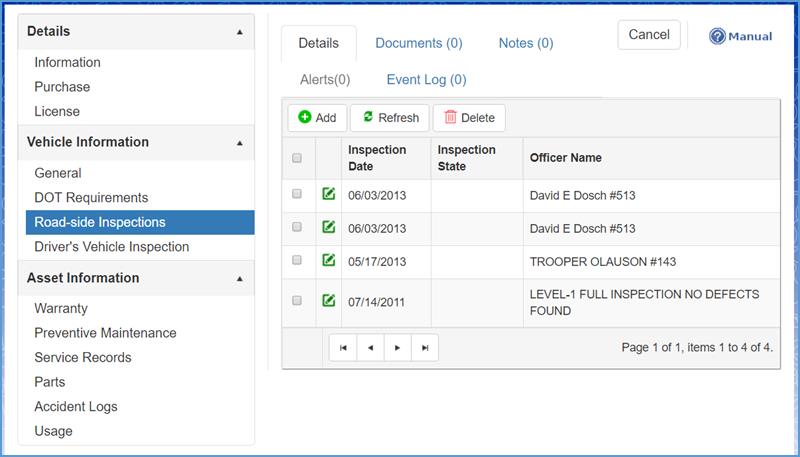
To add a new roadside inspection, click the Add button.
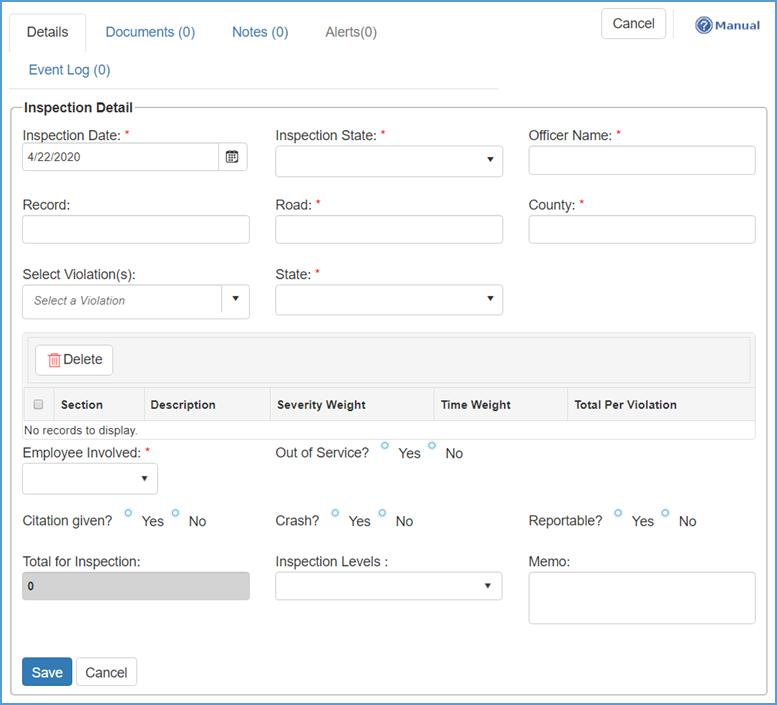
Fill in the required fields which include: Inspection Date; Inspection State; Officer Name; Road name; County; State; and, the Employee Involved.
When you select a violation from the drop-down list in the Select Violations field, it will appear in the grid located directly below the field.
Note: The Select Violation(s) field is also a search bar. You can type in a specific word and it will generate all results that pertain to it.

After implementing all pertinent information into the required fields, click the Save button.
Changes made will be reflected on the Roadside Inspections Home Page.
Assets Management Program: Vehicle Information – Drivers Vehicle Inspection
Under the Driver’s Vehicle Inspection module, users have the option of manually entering a driver vehicle inspection report for a specific driver.
Pro Tip: connect your Geotab account under settings to automatically populate all DVIRs!
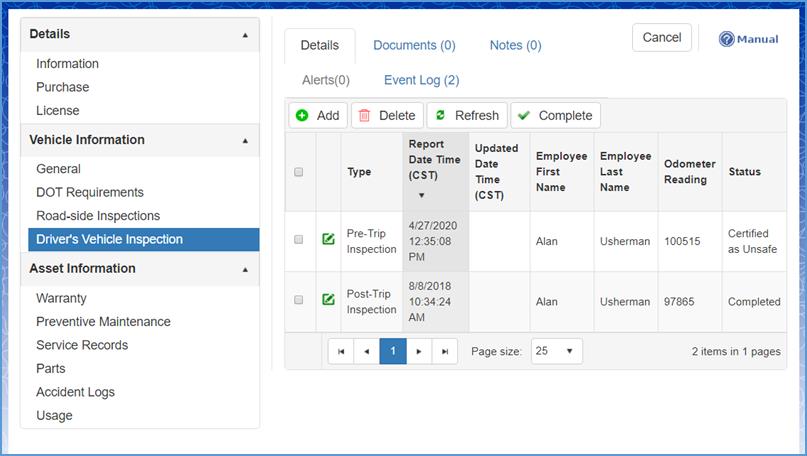
Under the Details tab, the following information will be reflected for the Driver’s Vehicle Inspection: Type of inspection; Report Date and Time; Updated Date and Time; Employee First Name; Employee Last Name; Odometer Reading of the specified vehicle; and, the Status.
To add a new driver’s vehicle inspection report, click the Add button. Refer to the following page.
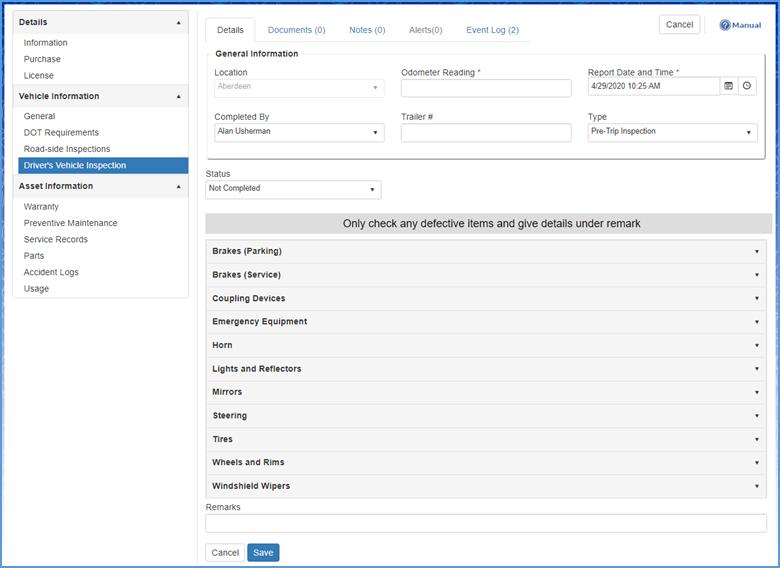
Step 2: Fill in the required fields which include the Odometer Reading and Report Date and Time.
Step 3: From the Vehicle Defect List, only check any defective items and give details under the remark field.
For more information on severity levels and vehicle/trailer defect lists, click here. You will be directed to the Administration: DVIR Log – Vehicle Defect List section.
After going through the defect list and marking all defects associated with the asset, navigate to the Status field and mark it Not Completed, Certified as Unsafe, or Completed.

When complete, click the Save button. All changes will be reflected under the Details tab of the Driver’s Vehicle Inspection module.
Assets Management Program: Asset Information – Warranty
Under the Warranty module, the user has the ability to add a warranty and information pertaining to a particular asset. The Warranty module can be found in the menu on the left-hand side of your screen under Asset Information.
To add a new warranty for a specific asset, click the Add button. The following page will appear.
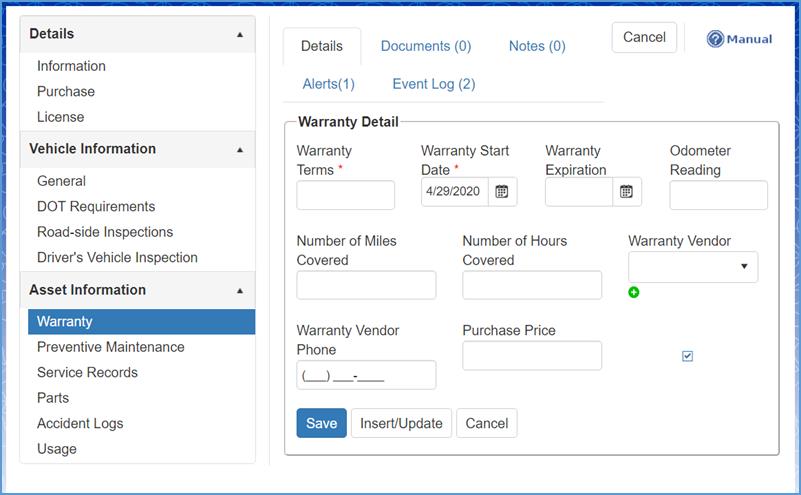
Fill in the required fields (Warranty Terms and Warranty Start Date) and any other fields that are applicable.
Note: The user has the ability to enable alerts for the specified warranty which is based on expiration date.
When complete, click the Save button.
An additional feature Craig Safety - Compliance Safety Manager™ offers is Insert/Update parts under the specified warranty details. This is to enter parts initially added to your asset (GPS units, add-on features you want to keep track of, etc.)
To access the Parts feature in this section, click the Insert/Update button.
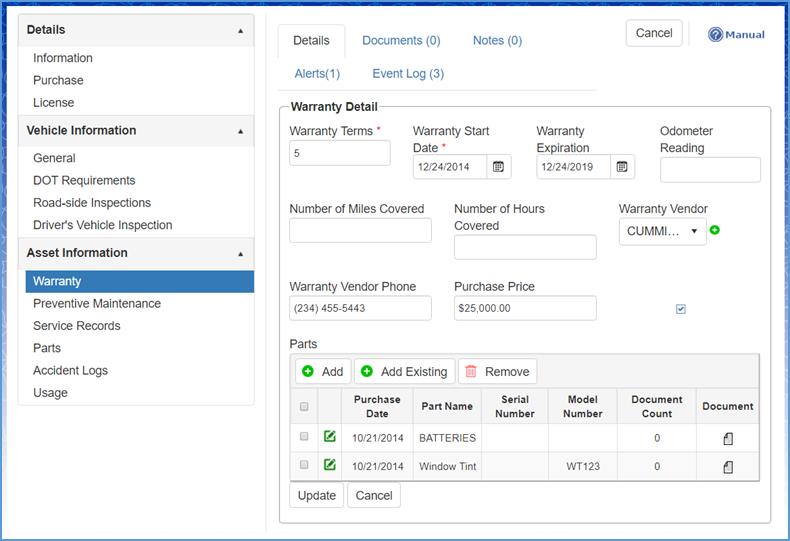
All asset parts added into the Parts module in the Asset Information section will reflect under the Warranty details. Click here for guidance to adding Parts.
Assets Management Program: Asset Information – Preventive Maintenance
The Preventive Maintenance module allows you to track routine maintenance for an asset based upon a specific time period.
To add a new Preventive Maintenance detail, click the Add button.
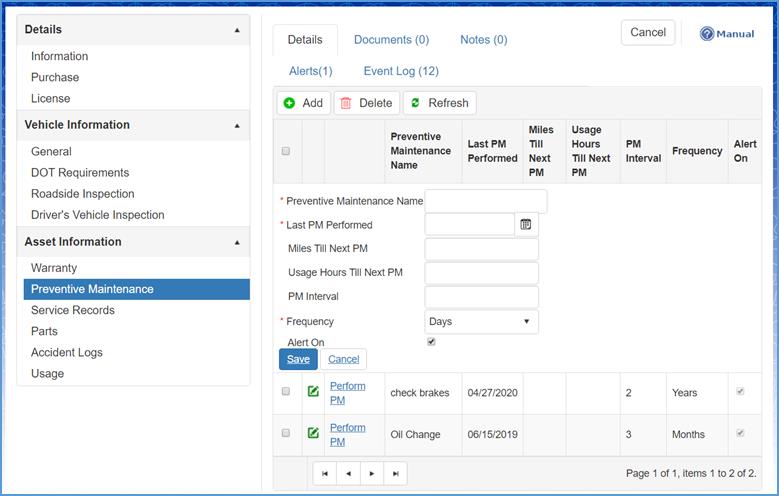
Fill in the Preventive Maintenance Name, Last PM Performed and the Frequency fields.
Note: The user has the ability to enable alerts for the specified maintenance item which is based on frequency.
When complete, click the Save button and all changed will be reflected under the Details tab in Preventive Maintenance.
Assets Management Program: Asset Information – Service Records
A service records allows you to keep track of all services and work performed on a specific asset. The user has the ability to track the: Cost of parts and labor; Individual(s) performing the service; If the service was Preventive Maintenance or regular maintenance; Payment method, Parts expended during service; Service vendor details; and, Asset readings at the time of service.
To access the Service Records module, navigate to the menu on the left-hand side of your screen and click on Service Records under the Asset Information section.
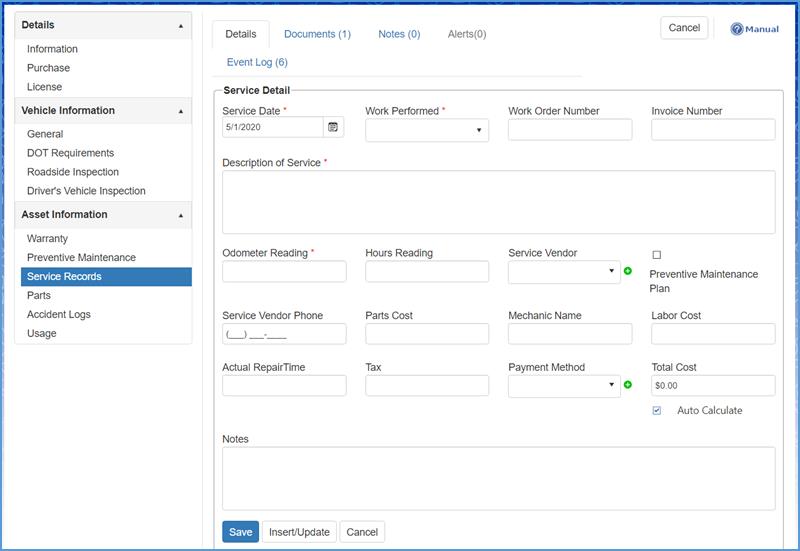
Select the Service Date, if the Work Performed was done internally or externally, the Description of Service, and the Odometer Reading of the given asset.
Note: After entering the information stated above, you can Insert/Update newly added parts for the asset.
When complete, click the Save button and the changes will be reflected under the Details tab.
Assets Management Program: Asset Information – Parts
In the Parts module, you have the ability to enter information for each specified part, track the given unit cost, and any information that pertains to the vendor.
Pro Tip: Parts will be automatically added to this section when entered from Warranty and/or Service Record modules.

To add a new part to your records, click the Add button (or click on the Edit button to make changes to an existing record).

Include the Purchase Date, Part Name, Quantity, and Unit Price for the specified part.
When complete, click he Save button. Changes will be reflected under the Details tab in the Parts module.
Note: Parts added here will also be available to be added in the following modules for future use of same part: Warranty and Service Records.
Assets Management Program: Asset Information – Accident Logs
-
Under the Accident Reports module, users have to ability to track accident information pertaining to a specific asset.
-
The Details tab in the Accident Logs module will display the Accident Date, Cause of Accident, Employee Involved, etc.
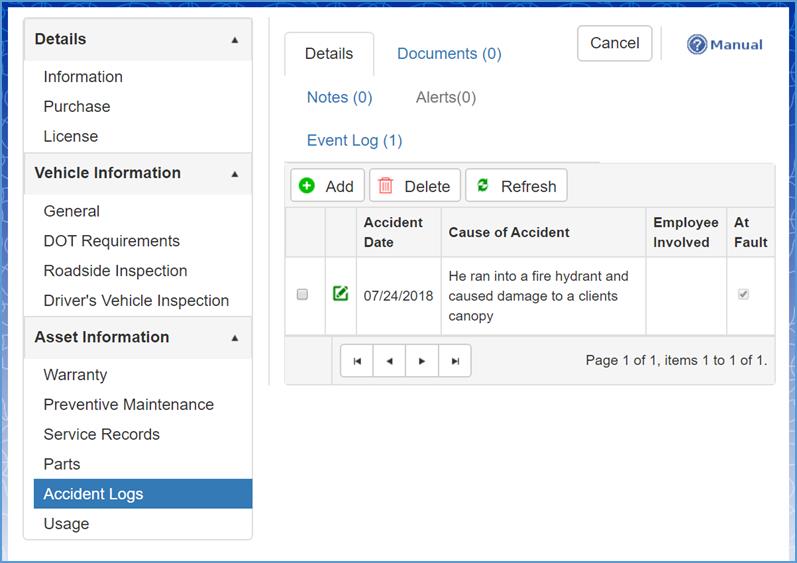
To add a new Accident Log record, click the Add button.
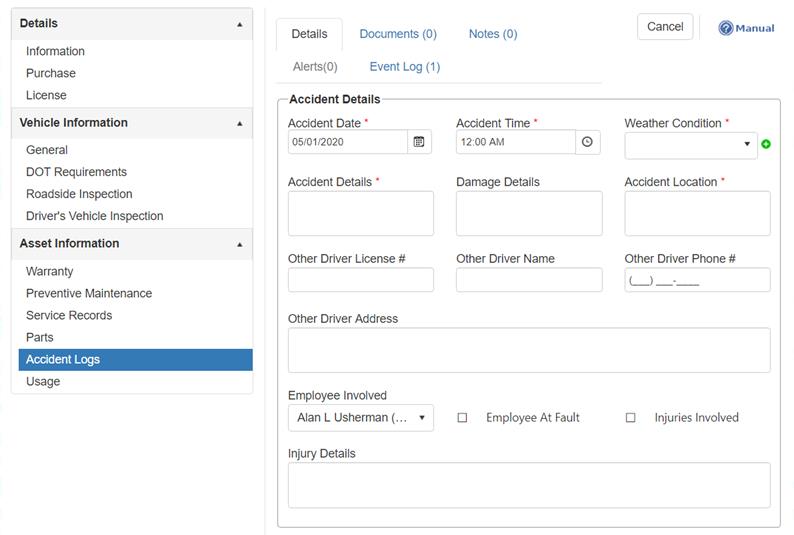
Fill in all required fields and any other information that’s applicable for the specified asset. Required fields include the Accident Date, Accident Time, Weather Condition, and Accident Details.
Note: If the ‘Employee Involved’ is documented, then this accident log record will appear in the specified employee’s ‘Accident Reports’ module in Personnel Management.
Alternative Accident Log Creation
You can also find the Accident Logs module in the Personnel Management program. As stated above, if the ‘Employee Involved’ is documented in the Accident Logs module, then it will appear in the employee’s file under that specific employee in the Personnel Management program. Correspondingly, when an Accident Report is documented in the Personnel Management program, then that record will appear in the Asset’s Accident Logs module.
Assets Management Program: Asset Information – Usage
Another feature Craig Safety - Compliance Safety Manager™ offers is the Usage module. The usage module allows the user to input information for a specified asset such as the: Start Usage Date and End Usage Date; State it’s being operated in; Last Odometer Reading; Total Miles; Last Hours Reading; Total Hours; Fuel Usage (per gallon); and, Fuel Cost.
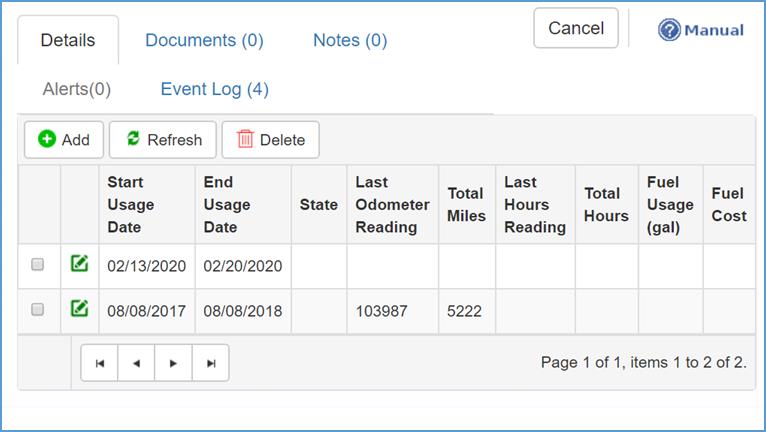
To add a new Usage record, click the Add button displayed by a green plus sign.
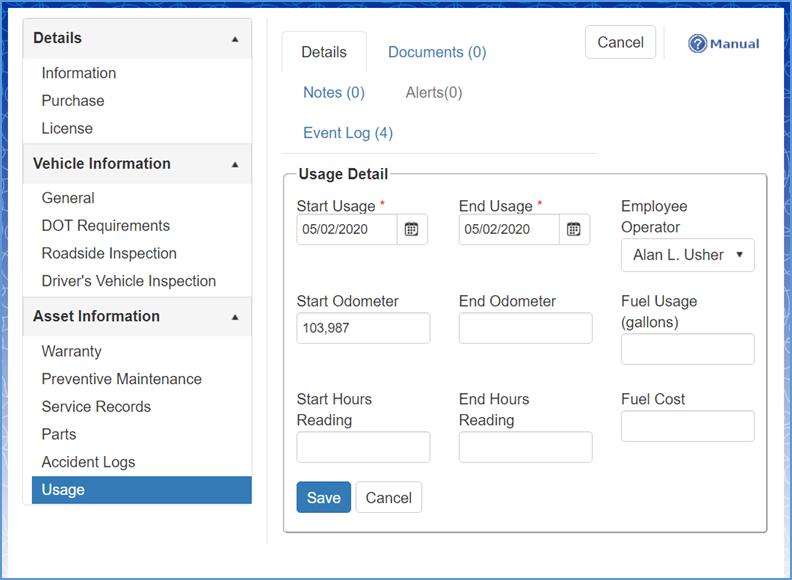
Fill in the Start Usage and End Usage fields (required) and any other information that is applicable to the specified asset.
When complete, click the Save button. Changes/updates will be reflected under the details tab in the Usage module.
Alternative Usage Record Creation
This module also exists in the Personnel Management program under the Usage Logs module. If you enter information into the ‘Employee Operator’ field, the usage record will show up in the Usage Logs module for that employee. Correspondingly, when creating a new usage record in the Personnel Management program under the Usage Logs module, and enter information into the ‘Asset Operated’ field, then it will display in that specified assets Usage module.
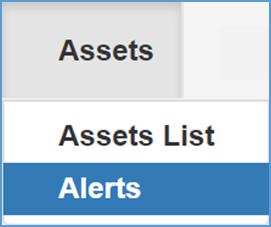
Assets Management Program: Alerts Tab
To access the Assets Management Program, navigate to the menu bar across the top of the Home Page. Hover your cursor over the Alerts tab, and from the drop-down list select the Alerts module.
This will direct you to the Asset Management: Alerts Home Page.
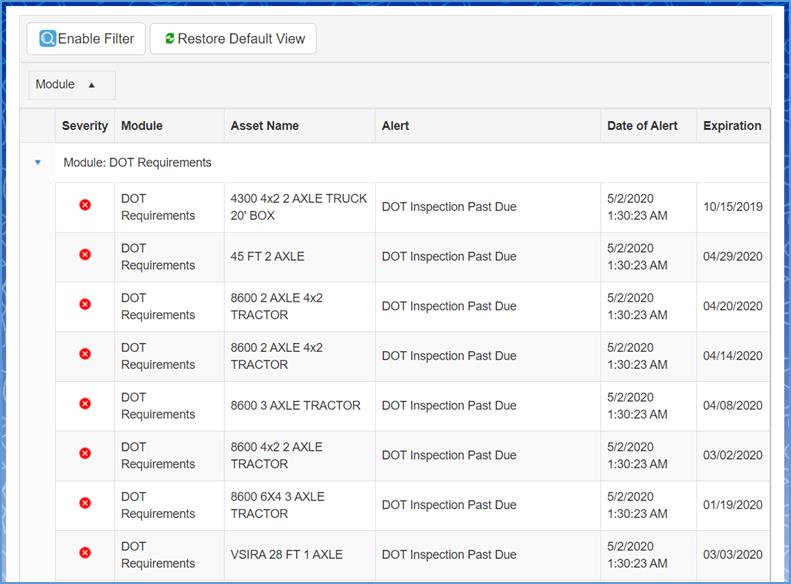
Click here to navigate to the General Functionality: Alerts section to learn more about alert features.